
 |
| I used a strip of paper tape with holes (reverse on the top 1/2) sprayed with water. |
 |
| paper tape with holes on the ends plus chipboard butterflies in the middle sprayed with water |
 |
| sprayed with broken china thru alphabet stencil |
 |
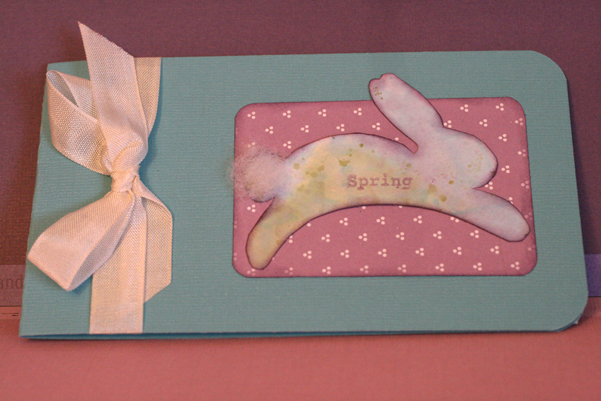
| sprayed with copper perfect pearls mixed with vintage photo ink |

 |
| I painted a little strip of pearl dabber paint and then stamped Spring on it |
I've been having a lot of fun spraying distress inks and water to make background papers for use in cards. I found a technique online by Dyan Reavely (Ranger educator for Great Britain) and loved the technique she taught on this video:
Here's the supply list and process I came up with since I don't have her sprays:
Supply list:
Supply list:
Ranger Craft sheet or other waterproof sheet/mat
Distress ink re-inkers (at least 3 coordinating colors)
--any dye ink should be ok
Water
Mini-misters or other small spray bottles-3 with color ink +1 water
White cardstock (I like to use 1/4 sheets but you can use larger)
Stencils, masks, punched borders, die cut shapes,chipboard letters, letter stickers, brass stencils
Heat tool
If you have perfect pearls, smooch, glimmer mist or other spray inks please try them (especially if you don’t want to make your own sprays). I did use perfect pearl spray and another I made up with copper perfect pearls and vintage photo ink that worked well but I’m not sure how the others will work with this technique.
To make sprays use 3 drops of Distress ink and then fill the rest of the mister with water. If your spray/mister is larger you will probably need more ink or just don’t fill all the way with water (the color will be too diluted). You want the color to be really intense/dark when you spray it on.
I like to use a Ranger mat to work on. Lay out several 1/4 sheets of paper on your mat and spray away using at least 3 coordinating colors of inks. Heat set. Add more interest to your background with more layers of color. Heat set again. Then lay your stencil down over one of your backgrounds and spray water over it. LET IT SIT FOR 15-20 seconds before removing the stencil. Set aside to dry while you work on more backgrounds. Turn stencil over and use the reverse that is wet (if you are using plastic stencils) too. Try color sprays and metallic or pearl mists on the stencils too. Have fun! Email me if you have questions. Be sure and watch Dyan's video! There's a link to her blog (Dylan's blog) on the right side of my blog under "blogs I follow" if you want to see more of her work.
Be sure to click on my blog header or "older posts" down at the bottom to read more posts with my IOD cards and bunny collection and trip to the Taft museum--I've added 3 in the past several days!
Be sure to click on my blog header or "older posts" down at the bottom to read more posts with my IOD cards and bunny collection and trip to the Taft museum--I've added 3 in the past several days!